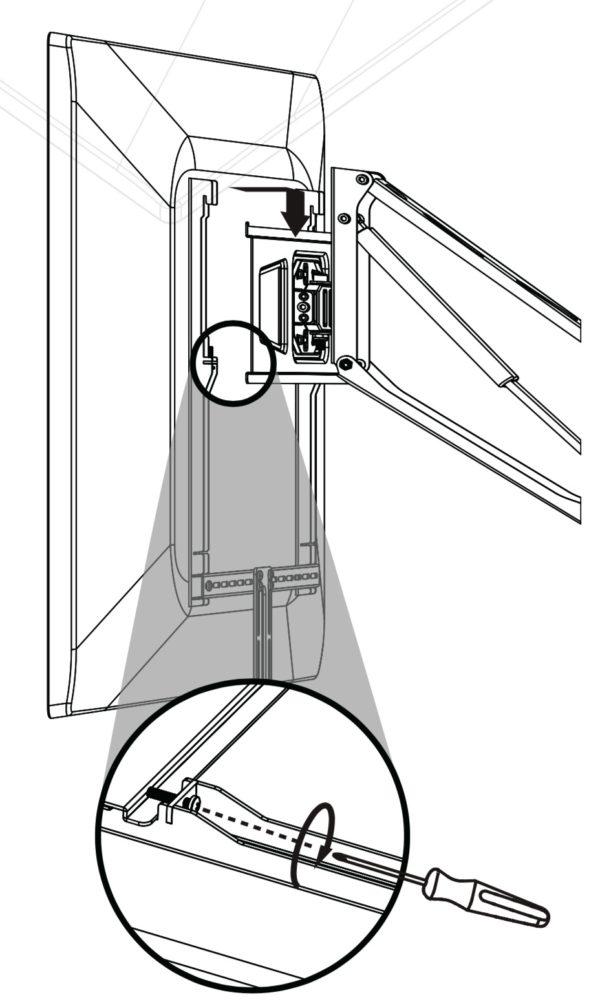
- The hooks on top of the hook bars are for hooking the TV to the bracket on the wall
Posted in Mount.
TV WALL MOUNT INSTALLATION GUIDE
Tranquil Mount Model:TMO100A
Support 40″ to 65″ TV Screens
Load Capacity: 16.5~70.5 lbs (7.5~32 kg)
TV VESA: 110x100mm, 120x180mm, 200x100mm, 200x200mm, 200x300mm, 300x300mm, 400x200mm, 400x400mm, and 600x400mm.
TV Weight (Without Stand): 7.5~32 kg [Once installed, Mount spring can be adjusted for the required weight]
TV Size: 40″ to 65″ (Recommend for use for TVs 55″ to 65″ (Not recommend for LG TV models, use TMO400A))
Screwdrivers, pencil, measuring rule, spanner, hammer, hacksaw
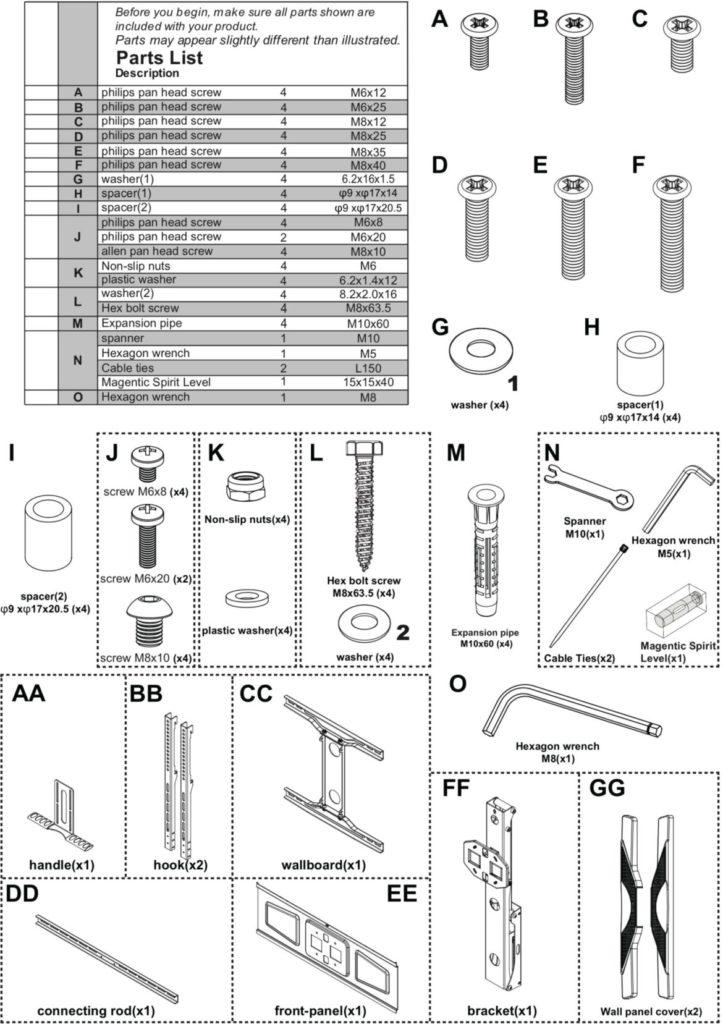
Ensure that all parts of the product are included in the product package

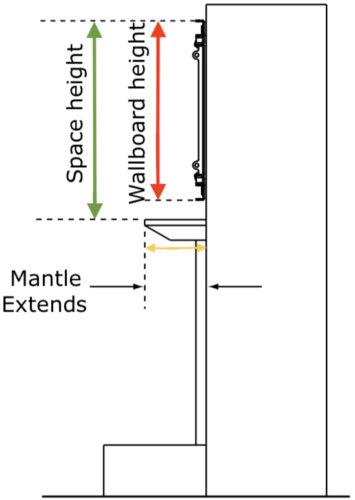
| If mantle extends: | Required space height: |
| Less than 203mm | TV wallboard height plus 102mm |
| 203 – 254mm | TV wallboard height plus 127mm |
| 254 – 305mm | TV wallboard height plus 178mm |
| 305 – 356mm | TV wallboard height plus 203mm |
Swing out drawing
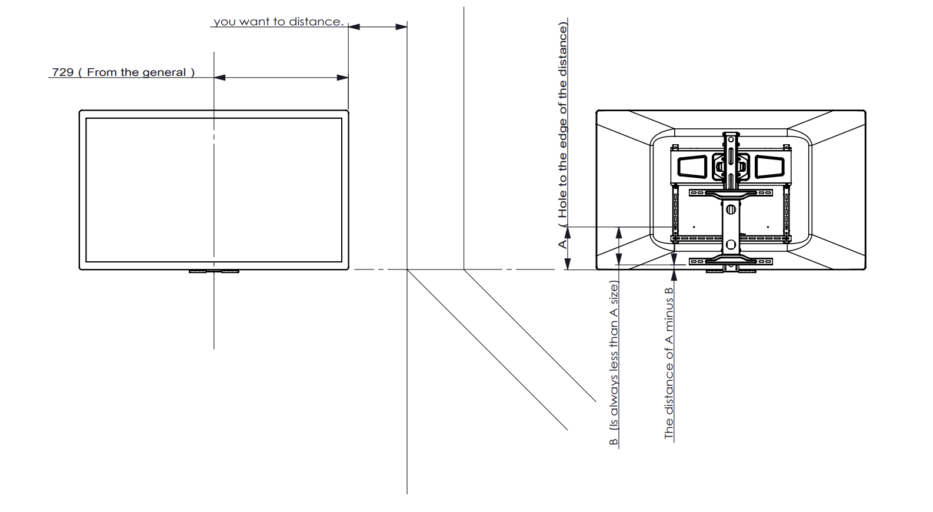
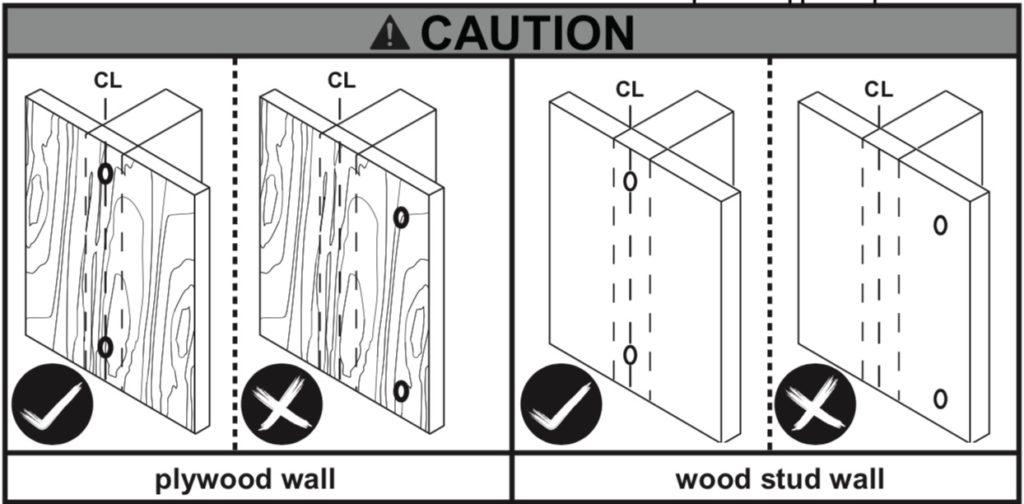
The above image is a rough guide for working out the TV drop position, as the VESA holes location on the back of the TV are different from TV to TV..
Plasterboard
Concrete
TIPs
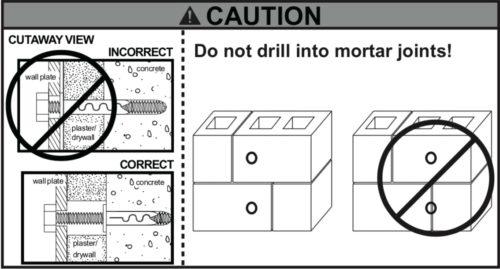
TIPs
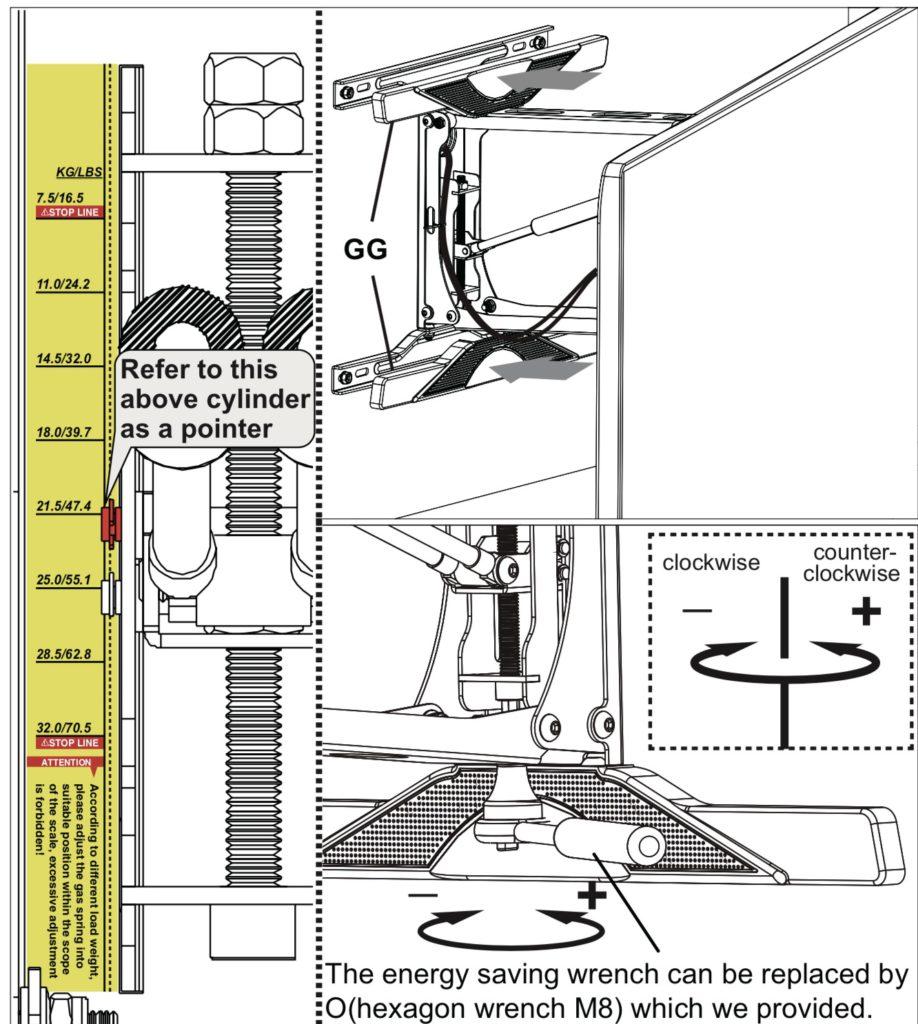
2. Installing the TV screen and adjusting the spring pressure
Work out with the bottom of the television when mounting the TV wall mount above the fireplace.
This TV wall mount Installation guide
Wall bracket, which is the most important part of the Tranquil Mount
Bracket-rises and lowers the TV
The hooks, fitting rod
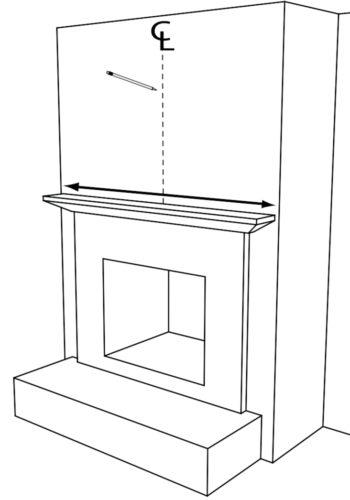
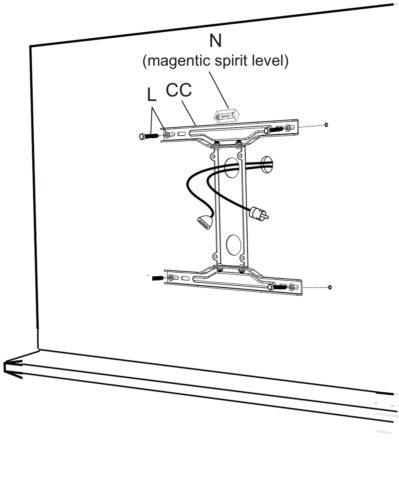
First mark the center line of the wall panel where the TV will be mounted on above the
Use the spirit level to mark the area of the wall bracket to find the center of the wall
Bottom of bracket should be 600 mtrs above the fireplace
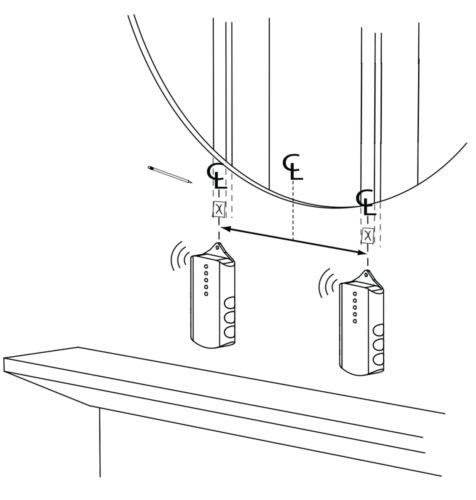
Ensure the centerline is shown in the holes on the wall bracket
Put the spirit above on top of the wall bracket while holding it on the wall to ensure that you have 100% level
Also ensure the bottom is lined with the centre line initially drawn on the wall
When the spirit level is 100%, the centre line passes through the centre of the two holes of the wall bracket,
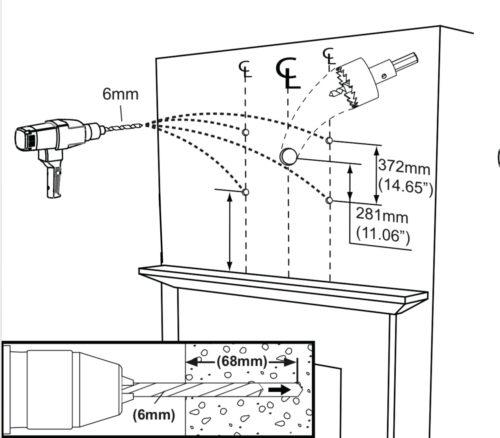
mark the mounting holes on the four corners of the wall bracket for your fixings
Use the 10mm plugs and the 10mm bolts supplied
For the concrete walls, you can drill the 8 mm holes and use the concrete nails
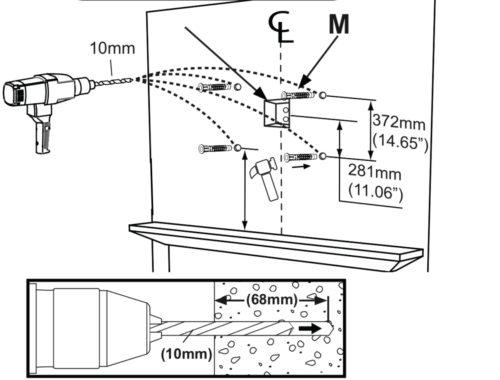
Drill the 10 mm holes first and then put the 10mm plugs
Mount the wall bracket and then insert the bolts; ensure that the centerline passes through the wall bracket holes before fixing the bolts
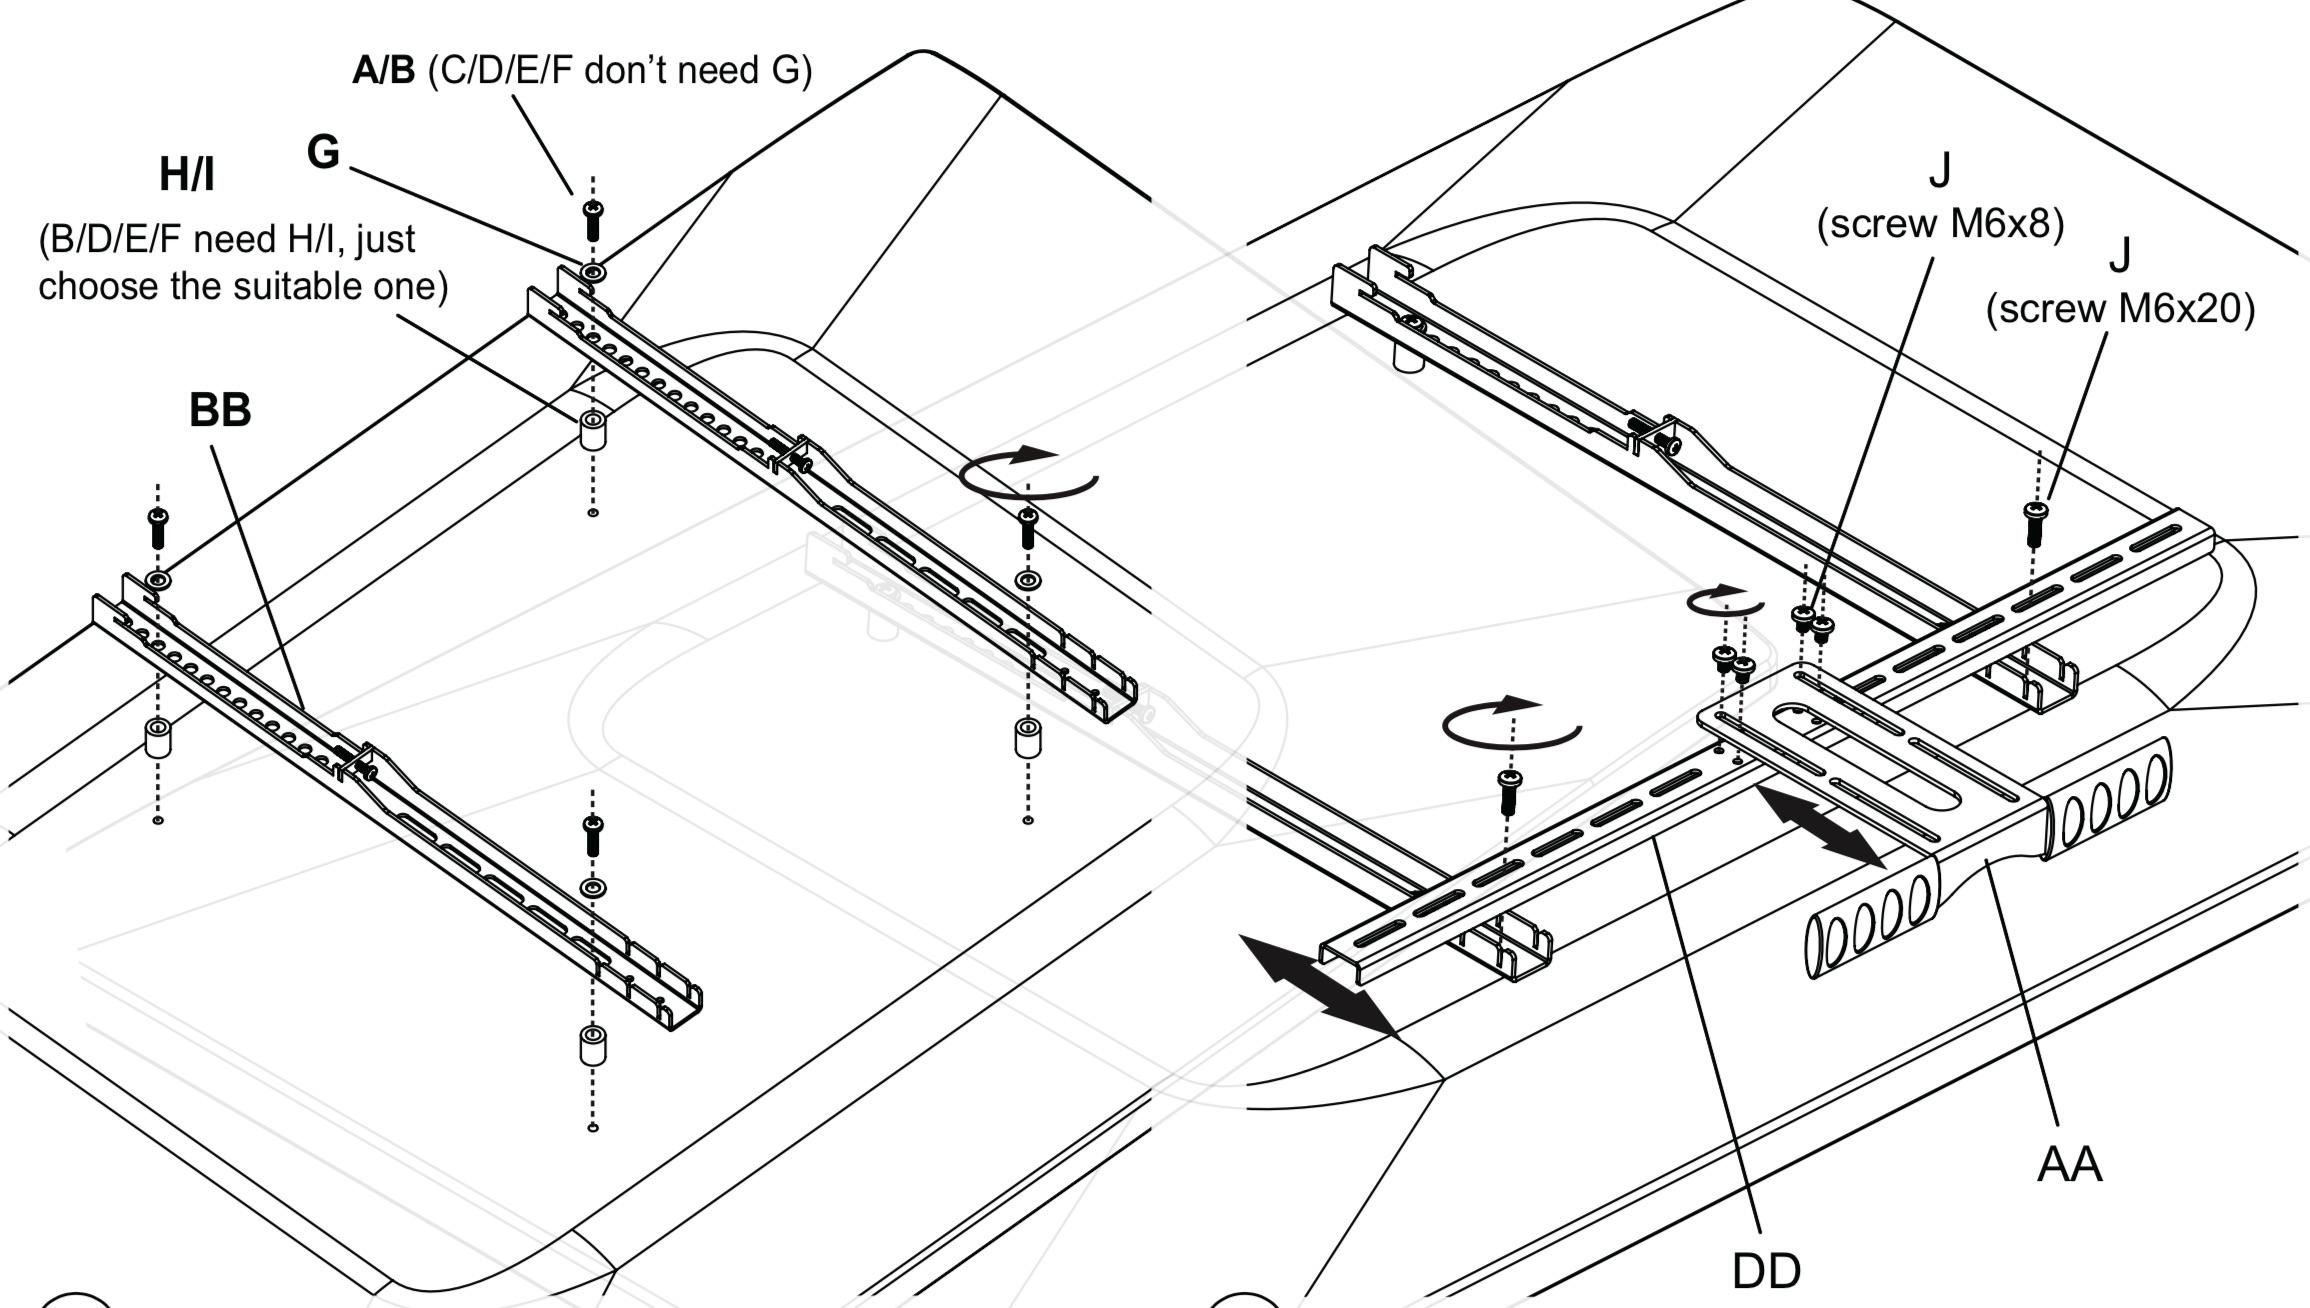
Join the bracket to the crosspiece and tighten using the small nuts provided
Use the small spanner provided to tighten the nuts joining the crosspiece and the bracket
Ensure the hook bars are not fixed below the TV
Use the washer and the nuts to screw the hook bars to the back of the TV
Also, ensure the screws at the back of the hook bars are undone for fixing the TV to the crossbar
Use the shorter screws to connect to the handle to the connecting rod already fixed to the hook bars
Slot the four mounting holes on the bracket to the bracket on the wall and the fix it in place with the screws that have been supplied in the box
The arrow written up on the cross bars confirm that the right connection has been realized
The calibration gauge for the television will give information on the adjustments to be made depending on the size of the TV
Posted in Mount.